

What are Kubernetes and Ansible? Kubernetes is the most popular opensource container orchestration platform built to host microservices and containers with platform functions such as high availability and self-healing and Ansible is a configuration management tool to automate steps to perform a series of code execution that sets up a virtual machine for example with usernames and ssh keys configured. In this tutorial, we're going to use Ansible to script playbooks to completely automate the setup of a Kubernetes cluster with 4 virtual machines.
Prerequisite Initial Steps
The initial first step would be to set up Ansible and your Ansible repository where you will run your Ansible playbooks from. In the inventory file set the ansible_user var the same as the user account you are going to use to set up the Kubernetes cluster. Follow the steps in this article to setup Ansible inside a Git repository:

The next step is to install the Ubuntu Linux systems and my choice was to create 4 virtual machines on my Proxmox Virtual Host which can be done with Terraform by following the steps in the tutorial below or you can set them up manually. This step will be different depending on where you install your virtual machines and what virtualization platform you use:

Once both these steps are completed ensure that you set up your SSH key pairs on each virtual machine for ssh connection with Ansible. Now we are ready to start scripting the Ansible playbooks and automate our Kubernetes Cluster setup.
Ansible Automated Deployment Setup For Kubernetes
Our first step is to check that Ansible can communicate and connect with all the virtual machines for the Kubernetes cluster. We will add the IP addresses of all the virtual machines in our inventory file like in the example below:
[k8s-master]
192.168.1.30

[k8s-workers]
192.168.1.31
192.168.1.32
192.168.1.33
Next, we will run a ping playbook to test the connection to all the virtual machines. The output of this step should look similar to the example below. Run the following command - ansible --key-file ~/.ssh/kube_rsa -i inventory all -m ping
192.168.1.32 | SUCCESS => {
    "ansible_facts": {
        "discovered_interpreter_python": "/usr/bin/python3"
    },
    "changed": false,
    "ping": "pong"
}
192.168.1.33 | SUCCESS => {
    "ansible_facts": {
        "discovered_interpreter_python": "/usr/bin/python3"
    },
    "changed": false,
    "ping": "pong"
}
192.168.1.30 | SUCCESS => {
    "ansible_facts": {
        "discovered_interpreter_python": "/usr/bin/python3"
    },
    "changed": false,
    "ping": "pong"
}
192.168.1.31 | SUCCESS => {
    "ansible_facts": {
        "discovered_interpreter_python": "/usr/bin/python3"
    },
    "changed": false,
    "ping": "pong"
}
Set Up Kubernetes User Accounts
Ensure that your public ssh key id_rsa.pub is copied to each of the 4 virtual machines. Next, add users.yml to your k8s directory in your Ansible repository and copy the playbook below.
- hosts: k8s-master, k8s-workers
  become: yes
  become_user: root
  vars_files:
    - ../../vars.yml
  tasks:
    - name: Create the kube user
      user: name=kube append=yes state=present createhome=yes shell=/bin/bash

    - name: Add kube user to sudo profiles and enable no password
      lineinfile:
        dest: /etc/sudoers
        line: 'kube ALL=(ALL) NOPASSWD: ALL'
        validate: 'visudo -cf %s'

    - name: Set ssh key for kube user
      authorized_key: user=kube key="{{item}}"
      with_file:
        - ~/.ssh/kube_rsa.pub
Execute this playbook by running the following command in your ansible terminal - ansible-playbook --key-file ~/.ssh/kube_rsa -i inventory playbooks/k8s/users.yml. You should see an output upon success similar to the below output.
PLAY RECAP ******************************************************************************
192.168.1.30               : ok=4    changed=3    unreachable=0    failed=0    skipped=0    rescued=0    ignored=0
192.168.1.31               : ok=4    changed=3    unreachable=0    failed=0    skipped=0    rescued=0    ignored=0
192.168.1.32               : ok=4    changed=3    unreachable=0    failed=0    skipped=0    rescued=0    ignored=0
192.168.1.33               : ok=4    changed=3    unreachable=0    failed=0    skipped=0    rescued=0    ignored=0
Install Kubernetes On All Nodes
The next step of this process is to set up k8s-install.yml in the k8s directory in your ansible repo. This step will install Kubernetes, the container runtime containerd, and set the system settings for Kubernetes on each of the nodes.
---
- hosts: k8s-master, k8s-workers
  become: yes
  become_user: root
  become_method: sudo
  gather_facts: yes
  vars_files:
    - ../../vars.yml
  tasks:
    - name: Create containerd config file
      ansible.builtin.file:
        path: "/etc/modules-load.d/containerd.conf"
        state: "touch"

    - name: Add config for containerd
      blockinfile:
        path: "/etc/modules-load.d/containerd.conf"
        block: |
              overlay
              br_netfilter

    - name: modprobe
      shell: |
              sudo modprobe overlay
              sudo modprobe br_netfilter


    - name: Set system configs for Kubernetes networking
      file:
        path: "/etc/sysctl.d/99-kubernetes-cri.conf"
        state: "touch"

    - name: Add config for containerd
      blockinfile:
        path: "/etc/sysctl.d/99-kubernetes-cri.conf"
        block: |
              net.bridge.bridge-nf-call-iptables = 1
              net.ipv4.ip_forward = 1
              net.bridge.bridge-nf-call-ip6tables = 1

    - name: Apply new settings
      command: sudo sysctl --system

    - name: Install containerd
      shell: |
              sudo apt-get update && sudo apt-get install -y containerd
              sudo mkdir -p /etc/containerd
              sudo containerd config default | sudo tee /etc/containerd/config.toml
              sudo systemctl restart containerd

    - name: Disable swap
      shell: |
              sudo swapoff -a
              sudo sed -i '/ swap / s/^\(.*\)$/#\1/g' /etc/fstab

    - name: Install and config dependencies
      shell: |
              sudo apt-get update && sudo apt-get install -y apt-transport-https curl
              curl -s https://packages.cloud.google.com/apt/doc/apt-key.gpg | sudo apt-key add -

    - name: Create kubernetes repo file
      file:
        path: "/etc/apt/sources.list.d/kubernetes.list"
        state: "touch"

    - name: Add K8s source
      blockinfile:
        path: "/etc/apt/sources.list.d/kubernetes.list"
        block: |
              deb https://apt.kubernetes.io/ kubernetes-xenial main

    - name: Install kubernetes
      shell: |
              sudo apt-get update
              sudo apt-get install -y kubelet=1.20.1-00 kubeadm=1.20.1-00 kubectl=1.20.1-00
              sudo apt-mark hold kubelet kubeadm kubectl
Run the following command - ansible-playbook --key-file ~/.ssh/kube_rsa -i inventory playbooks/k8s/k8s-install.yml to execute this playbook which should give you an output displayed below if all steps are completed successfully:

Set Up The Kubernetes Master Node
The master node commonly referred to as the control plane is what we are going to set up with this playbook called master.yml. We will use flannel for our pod network and initialize the Kubernetes cluster.
---
- hosts: k8s-master
  become: yes
  vars_files:
    - ../../vars.yml
  tasks:
    - name: Initialize k8s cluster
      shell: kubeadm init --pod-network-cidr=10.244.0.0/16
      args:
        chdir: $HOME
        creates: cluster_initialized.txt

    - name: Set firewall rules UFW
      become: yes
      ansible.builtin.shell:  |
          sudo ufw allow 6443/tcp
          sudo ufw allow 2379/tcp
          sudo ufw allow 2380/tcp
          sudo ufw allow 10250/tcp
          sudo ufw allow 10251/tcp
          sudo ufw allow 10252/tcp
          sudo ufw allow 10255/tcp
          sudo ufw reload

    - name: Create .kube directory
      become_user: kube
      become: yes
      ansible.builtin.file:
        path: $HOME/.kube
        state: directory
        mode: '0755'

    - name: Copy admin.conf to user kube config
      copy:
        src: /etc/kubernetes/admin.conf
        dest: /home/kube/.kube/config
        remote_src: yes
        owner: kube

    - name: Install Pod network
      become: yes
      become_user: kube
      shell: kubectl apply -f https://github.com/coreos/flannel/raw/master/Documentation/kube-flannel.yml
      args:
        chdir: $HOME

    - name: Get token to join worker nodes to k8s cluster
      become: yes
      become_user: kube
      ansible.builtin.shell: kubeadm token create  --print-join-command
      register: kubernetes_join_command

    - name: Display k8s join command
      ansible.builtin.debug:
        msg: "{{ kubernetes_join_command.stdout }}"

    - name: Copy join command to local file on Ansible host
      become: yes
      local_action: copy content="{{ kubernetes_join_command.stdout_lines[0] }}" dest="/tmp/kubernetes_join_command" mode=0777
Run the following command - ansible-playbook --key-file ~/.ssh/kube_rsa -i inventory playbooks/k8s/master.yml. Once the steps are complete the control plane or master node will be set up and you should see an output like this:

Join Worker Nodes To Kubernetes Cluster
Once the master node is ready the worker nodes should be joined to the Kubernetes cluster. Copy the playbook below which will set the firewall rules on the worker nodes and join the worker nodes to the Kubernetes cluster.
---
- hosts: k8s-workers
  become: yes
  gather_facts: yes
  vars_files:
    - ../../vars.yml
  tasks:
    - name: Set firewall rules UFW
      become: yes
      ansible.builtin.shell:  |
          sudo ufw allow 10251/tcp
          sudo ufw allow 10255/tcp
          sudo ufw reload

    - name: Copy join command from Ansible host to the worker nodes.
      become: yes
      copy:
        src: /tmp/kubernetes_join_command
        dest: /tmp/kubernetes_join_command
        mode: 0777

    - name: Join the Worker nodes to the cluster.
      become: yes
      command: sh /tmp/kubernetes_join_command
      register: joined_or_not

    - name: Node join status
      ansible.builtin.debug:
        msg: "{{ joined_or_not.stdout }}"
Run this command - ansible-playbook --key-file ~/.ssh/kube_rsa -i inventory playbooks/k8s/workers.yml to join all the worker nodes. Once the playbook is executed successfully log into the master node and run kubectl get nodes which should display the following output. If some of your node show not ready give it a couple of minutes to get ready.

NAME         STATUS   ROLES                  AGE     VERSION
k8s-master   Ready    control-plane,master   6m22s   v1.20.1
k8s-node1    Ready    <none>                 5m52s   v1.20.1
k8s-node2    Ready    <none>                 5m52s   v1.20.1
k8s-node3    Ready    <none>                 5m52s   v1.20.1
Automate This Process With One Playbook
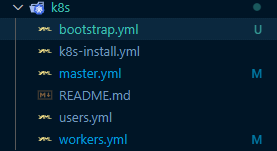
If you created all the playbooks and do not want to execute the above playbooks one by one then you can additionally create the bootstrap.yml playbook and run it to perform all the above steps in sequence. Copy the below playbook and in your k8s directory name it bootstrap.yml.
---
- name: Install kubernetes
  import_playbook: k8s-install.yml

- name: Bootstrap master node
  import_playbook: master.yml

- name: Join worker nodes to kube cluster
  import_playbook: workers.yml
Run the following command to automate all the playbooks' execution with one playbook - ansible-playbook --key-file ~/.ssh/kube_rsa -i inventory playbooks/k8s/bootstrap.yml. Once completed login to the master node and run kubectl get nodes to see if your Kubernetes cluster is up and the worker nodes joined to the cluster.
NAME         STATUS   ROLES                  AGE     VERSION
k8s-master   Ready    control-plane,master   6m22s   v1.20.1
k8s-node1    Ready    <none>                 5m52s   v1.20.1
k8s-node2    Ready    <none>                 5m52s   v1.20.1
k8s-node3    Ready    <none>                 5m52s   v1.20.1
Once you confirm that the cluster is up and running and all the worker nodes are joined to the Kubernetes cluster you can go ahead and deploy a pod and start running applications on your Kubernetes cluster.
Conclusion
In conclusion, Kubernetes is the most popular container orchestration platform in the world and comes with support from a large open-source community. If you enjoyed this article consider signing up for our newsletter and don't forget to share it with people that would find it useful. Leave a comment below with a tutorial you would like us to cover.