

The rise of cloud computing and software platforms has put templating or virtual instances in high demand. To be able to build 100 virtual instances with a code base and a click of a button is something no organization or technologist can go without nowadays. Today we are going to build a minimal Ubuntu Linux Server 2404 LTS Proxmox VM template that can be used with various Infrastructure as code tools like Terraform:
1. Create A New VM In Proxmox
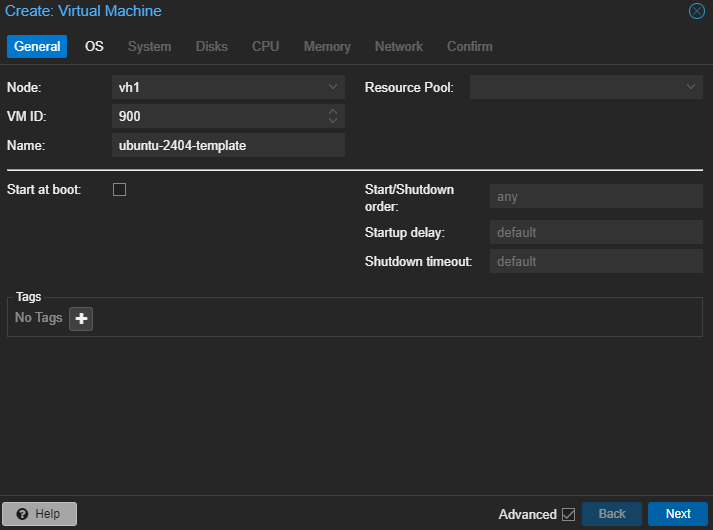
Under general we will select which Proxmox node to use as well as the VM ID and Name. I am going to build an Ubuntu Linux 2404 LTS template so I will name it ubuntu-2404-template like in the image below.
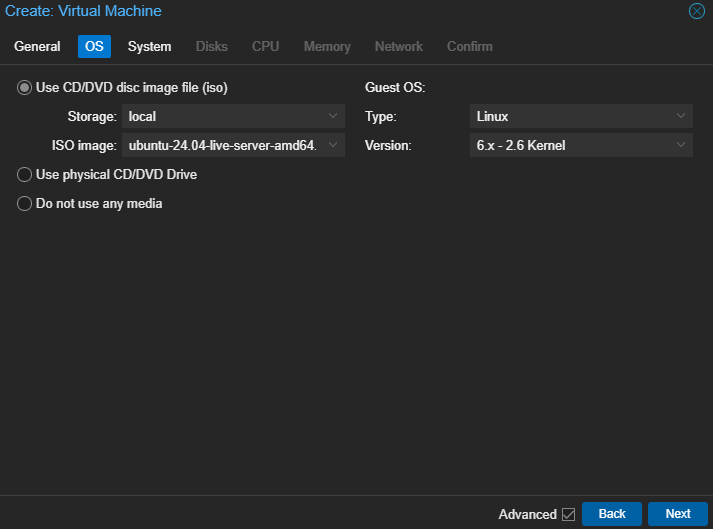
Next in the OS section, we will select the Ubuntu Linux Server 2404 ISO that we will use to install the operating system.
Next under System we can change the SCSI Controller to VirtIO SCSI and tick Qemu Agent.

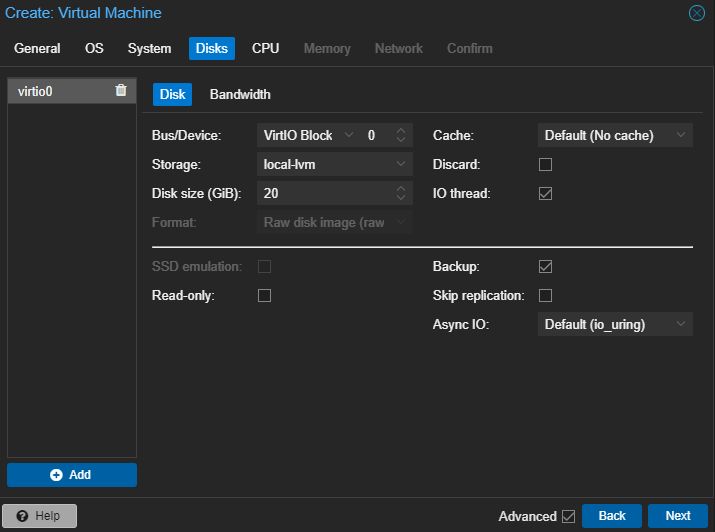
Under the disks section change the Bus/Device to VirtIO Block and choose a disk size for your disk. This is just a template so you can make the disk size 20GB or 30GB.
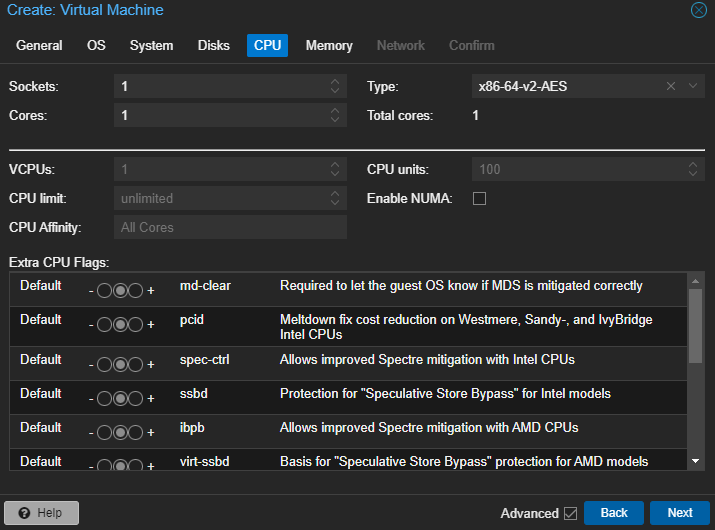
Under the CPU section we can leave it to 1 socket and 1 core as this is just a template.
Next in the memory section we can leave it on 2048 or even take it to 1024 again as this is just going to be a template for your VM builds.

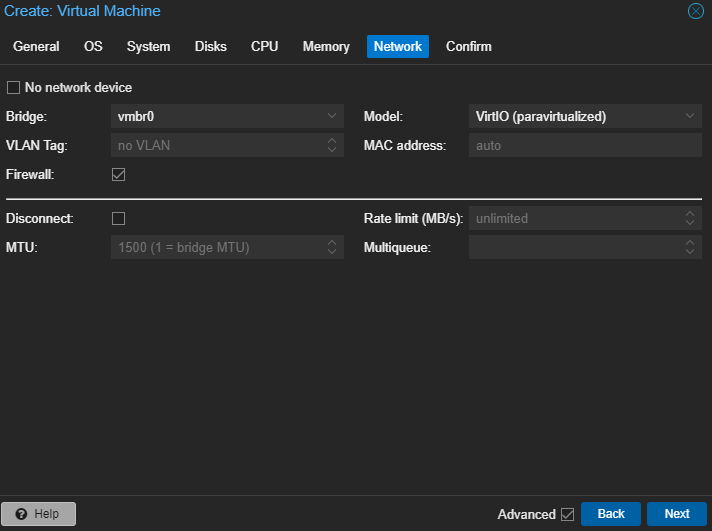
Your network settings can be kept default as is or you can select a network if you created additional virtual networks.
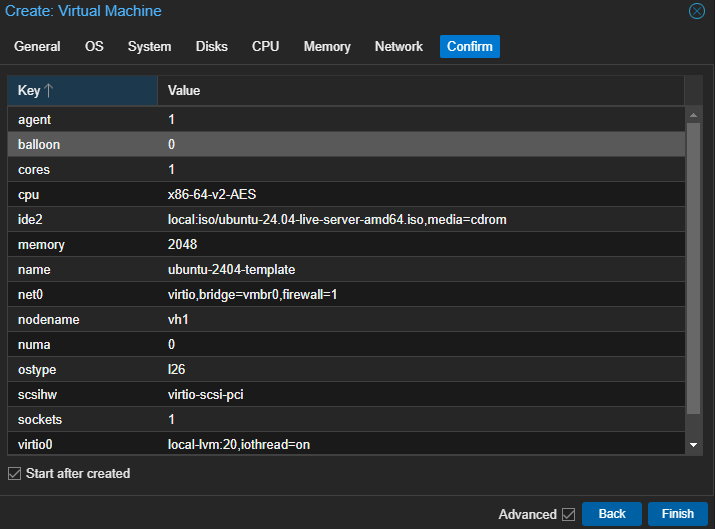
Once done we can confirm all our settings under the confirm tab and click finish to create our VM.
2. Install Ubuntu Linux Server 2404
We are going to use Ubuntu Server 2404 like I mentioned above but you can feel free to use previous Ubuntu Linux versions. Once your VM starts up follow the installation steps including creating the hostname and username and when you get to the disk section to configure your disk settings and disk space ensure that you untick Set up this disk as an LVM group and continue.

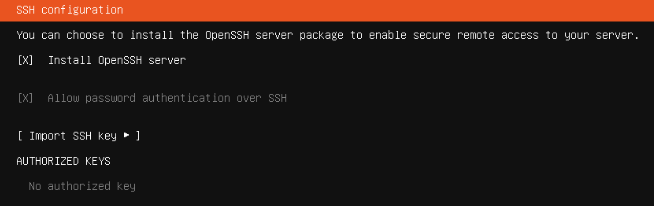
You can choose any hostname and username as the hostname will and can be changed when you set up a new VM from your template, either with Terraform or just creating a clone in the Proxmox Web UI. One critical thing is to also ensure that you tick off Install OpenSSH the server as you will need an SSH connection to set a couple of configs before converting your VM to a template.
Once all your installation configs are set, start the installation and wait for it to complete.

3. VM Set Minimal Configs And Convert To Template
Once the installation of Ubuntu Server completes we are going to switch on the VM and log in to configure the username and add it to the sudoers file as well as installing the Qemu agent so Proxmox can communicate and connect to the VM. Additionally, you can also feel free to add an SSH key if you are using SSH keys in your platform environments which is highly recommended but for this tutorial we will skip it.
3.1 Add Username To Sudoers
Open the sudoers file with sudo nano /etc/sudoers and add the line below to your sudoers file, please replace username with your username. You don't have to use nanois highly recommended you can also feel free to use vi or vim or whatever terminal editor suits you.
username ALL=(ALL) NOPASSWD:ALL
Once done and added run sudo reboot to reboot your virtual machine.
3.2 Install Updates And Qemu Agent
Once your VM has started up again run the following commands in the order below to install updates, the qemu agent, and shut down your VM.
sudo apt update
sudo apt upgrade -y
sudo apt install qemu-guest-agent
sudo systemctl enable qemu-guest-agent
sudo cloud-init clean
sudo shutdown -h now
3.3 Add Cloud-Init Drive To VM
Before we can convert our template we will create a new cloud-init drive under the hardware section of your VM like in the example below.
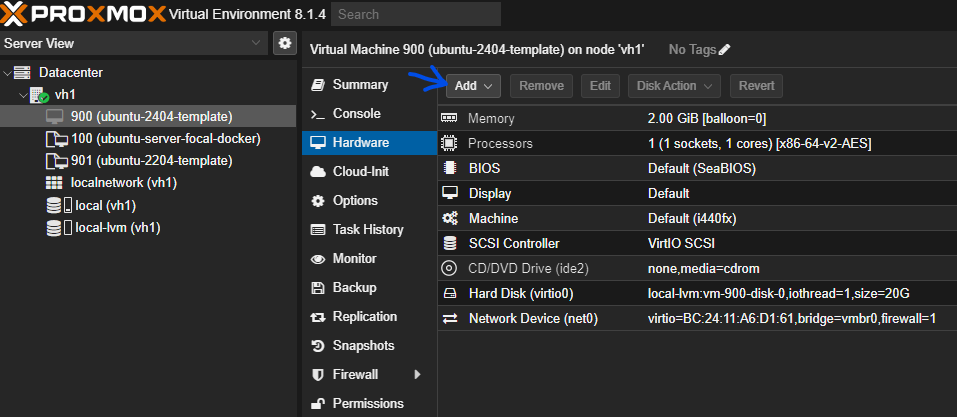

You don't have to set anything in the cloud-init tab and just leave it as it is once added.
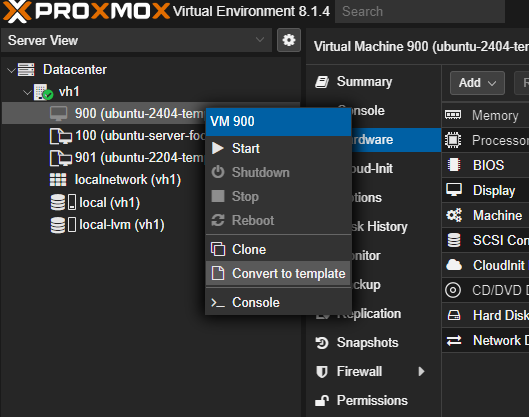
3.4 Convert VM To Template
Once we are done with all the above steps we can go ahead and right-click on our VM and convert it to a template. Once it is converted you can use it to clone and deploy multiple virtual instances from the Proxmox dashboard or with IAC tools such as Terraform.
Conclusion
In conclusion, this is a simple minimal VM template that can be used with Terraform or other IaC tools such as Ansible or Pulumi. If you enjoyed this article consider signing up for our newsletter and don't forget to share it with people who would find it useful. Leave a comment below with a tutorial you would like us to cover.