

If you have a Proxmox VE server for all your virtual machines like myself and are looking to build many VMs with code and automate the build process, then Terraform is one of the most widely used IaC tooling available. I have been using Terraform both personally and in a professional capacity and it is a tool that continuously improves in capability and reliability. Let's dive into a step-by-step process of how to build multiple VMs with code scripts and deploy them to your Proxmox virtual host with one execution.
Also, read how to build a custom ubuntu Linux image with packer for Proxmox.
Install Terraform
You can install terraform with a few simple CLI commands depending on your operating system.
MacOS – ensure that you have brew package manager installed:
brew tap hashicorp/tap
brew install hashicorp/tap/terraform
Windows – use the PowerShell terminal and ensure you have the chocolatey package manager installed:
choco install terraform
Linux – Ubuntu/Debian:
echo "deb [signed-by=/usr/share/keyrings/hashicorp-archive-keyring.gpg] \
    https://apt.releases.hashicorp.com $(lsb_release -cs) main" | \
    sudo tee /etc/apt/sources.list.d/hashicorp.list
sudo apt update
sudo apt-get install terraform
Linux – Fedora:
sudo dnf install -y dnf-plugins-core

sudo dnf config-manager --add-repo https://rpm.releases.hashicorp.com/fedora/hashicorp.repo

sudo dnf -y install terraform
Create API Token For Proxmox User
Next, we should log in to the Proxmox VE dashboard and navigate to -> Datacenter -> Permissions -> API Tokens and add a new API token for your user (can be any user with root permissions) and remember to deselect Privilege Separation. Create and copy your token secret and add it to the credentials file in your packer image build repository.

Create Terraform Code Repository
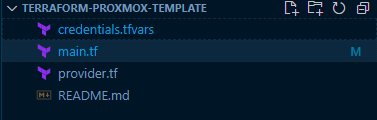
Create a Terraform code repository and create the files in the image below accordingly. Copy the code below to each file and edit according to your environment. You can also copy the code from this template repository.
credentials.tfvars
proxmox_api_url = "https://0.0.0.0:8006/api2/json"  # Your Proxmox IP Address
proxmox_api_token_id = "terraform@pam!terraform"  # API Token ID
proxmox_api_token_secret = "your-api-token-secret"
provider.tf
# Proxmox Provider
# ---
# Initial Provider Configuration for Proxmox


terraform {

    required_version = ">= 0.13.0"

    required_providers {
        proxmox = {
            source = "telmate/proxmox"
        }
    }
}

variable "proxmox_api_url" {
    type = string
}

variable "proxmox_api_token_id" {
    type = string
}

variable "proxmox_api_token_secret" {
    type = string
}

provider "proxmox" {

    pm_api_url = var.proxmox_api_url
    pm_api_token_id = var.proxmox_api_token_id
    pm_api_token_secret = var.proxmox_api_token_secret

    # (Optional) Skip TLS Verification
    pm_tls_insecure = true
}
main.tf
# Proxmox Full-Clone
# ---
# Create a new VM from a clone

resource "proxmox_vm_qemu" "your-vm" {

    # VM General Settings
    target_node = "your-proxmox-node"
    vmid = "100"
    name = "vm-name"
    desc = "Description"

    # VM Advanced General Settings
    onboot = true

    # VM OS Settings
    clone = "your-clone"

    # VM System Settings
    agent = 1

    # VM CPU Settings
    cores = 1
    sockets = 1
    cpu = "host"

    # VM Memory Settings
    memory = 1024

    # VM Network Settings
    network {
        bridge = "vmbr0"
        model  = "virtio"
    }

    disk {
        storage = "local-lvm"
        type = "virtio"
        size = "20G"
    }

    # VM Cloud-Init Settings
    os_type = "cloud-init"

    # (Optional) IP Address and Gateway
    ipconfig0 = "ip=0.0.0.0/0,gw=0.0.0.0"

    # If your packer image template already has a user and ssh key created then only use this step
    # to create an additional user and ssh key pair

    # (Optional) Default User
    # ciuser = "your-username"
    # (Optional) Add your SSH KEY

    # sshkeys = <<EOF
    # #YOUR-PUBLIC-SSH-KEY
    # EOF

}
Plan And Apply Terraform Code
After you created all the tf files you can initiate terraform to install the provider plugin.
terraform init
Once initiated you can run a terraform plan to get an output of the resources that will be deployed to your Proxmox server.
terraform plan -var-file="credentials.tfvars"
After the output is successfully generated you can go ahead and apply to deploy your resources to your Proxmox virtual host.
terraform apply -var-file="credentials.tfvars"
If you want to destroy your resources you can do it with terraform destroy.
terraform destroy -var-file="credentials.tfvars"
Once all your virtual machines are deployed you should be able to connect to them via ssh key pairs that you configured or built into your packer VM image.
Conclusion
In conclusion, I am a big Terraform fan as it is really robust and reliable to define your resources via code and deploy it to your virtual and cloud environments. If you enjoyed this article consider signing up for our newsletter and don't forget to share it with people that would find it useful. Leave a comment below with a tutorial you would like us to cover.